
Keeping your golf cart running is important. A healthy charger is key. Testing the charger ensures it works well. This guide shows you how.
Credit: jsgolfcarts.com
Why Test Your Golf Cart Charger?
The charger keeps your cart’s battery full. A broken charger means a dead battery. Testing helps find problems early. This keeps your cart ready to use.
Tools You Need
You need a few tools to test your charger:
- Multimeter
- Safety gloves
- Safety glasses
Step-by-Step Guide
Follow these steps to test your golf cart charger:
Step 1: Safety First
Wear safety gloves and glasses. Electricity can be dangerous. Safety is very important.
Step 2: Check The Charger Cord
Look at the charger cord. Is it damaged? A damaged cord can cause problems. If the cord is fine, move to the next step.
Step 3: Connect The Charger
Plug the charger into the wall. Then, connect it to your golf cart. Make sure all connections are tight.
Step 4: Use The Multimeter
Set the multimeter to DC volts. This measures the voltage from the charger.
- Place the multimeter leads on the charger output.
- The red lead goes to the positive terminal.
- The black lead goes to the negative terminal.
Step 5: Read The Multimeter
Look at the multimeter display. It shows the voltage. The voltage should match the charger rating. Check the charger label for this rating.
Step 6: Compare The Voltage
If the voltage matches, your charger works. If it doesn’t, there is a problem. You may need a new charger or repairs.

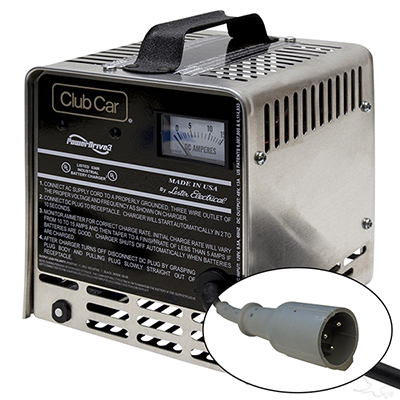
Credit: carts-and-parts.com
Common Problems and Fixes
Sometimes, the charger may not work. Here are common problems and simple fixes:
Problem 1: No Power
Check the wall outlet. Is it working? Try another device in the outlet. If the outlet is fine, check the charger fuse. Replace it if needed.
Problem 2: Low Voltage
This can happen if the battery is very low. Charge the battery for a few hours. Then, test the voltage again.
Problem 3: Overheating
Overheating can damage the charger. Make sure the charger is in a cool, dry place. If it still overheats, you may need a new charger.
Tips for Charger Care
Taking care of your charger extends its life. Here are some tips:
- Keep it clean and dry
- Store it in a cool place
- Check cords for damage regularly
Frequently Asked Questions
How Do I Know If My Golf Cart Charger Is Working?
Check the charger’s LED indicator. A green light means it’s working.
What Are The Signs Of A Faulty Golf Cart Charger?
No lights, no charging sound, or the cart not charging fully.
How Can I Test My Golf Cart Charger At Home?
Use a multimeter to check the voltage output.
Why Is My Golf Cart Charger Not Turning On?
Check the power source, connections, and fuse.
Conclusion
Testing your golf cart charger is easy. Follow the steps in this guide. Keep your charger in good shape. This ensures your golf cart is always ready to go.


Leave a Reply