
Disc golf is fun. Dyeing your discs makes it more fun. In this guide, we will learn how to dye disc golf discs. You can create unique designs and colors. Let’s get started!
Materials You Will Need
Before you begin, gather these materials:
- Disc golf discs
- Rit dye (liquid or powder)
- Acetone
- Masking tape
- Latex gloves
- Plastic containers
- Hot water
- Paper towels
- Plastic wrap

Credit: www.amazon.com
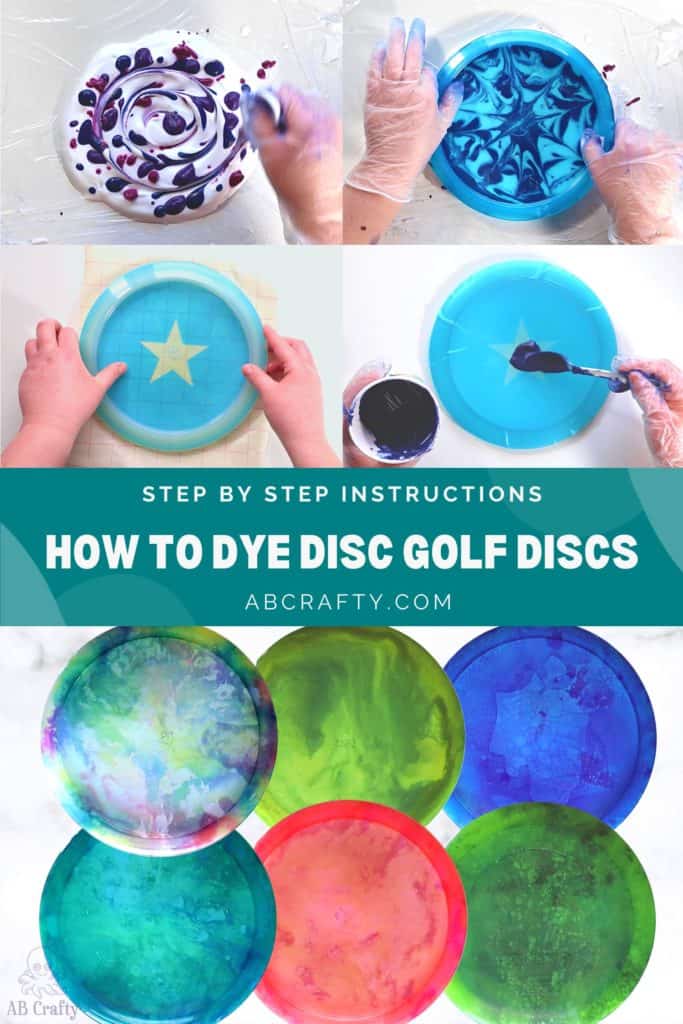
Credit: www.abcrafty.com
Step-by-Step Instructions
Follow these steps to dye your disc golf discs:
Step 1: Clean The Disc
First, clean the disc. Use soap and water. Dry it with a paper towel.
Step 2: Remove The Stamp
Most discs have a stamp. Use acetone to remove it. Wear gloves. Pour a small amount of acetone on a paper towel. Rub the stamp until it is gone. Do this in a well-ventilated area.
Step 3: Prepare The Dye
Now, prepare your dye. Fill a plastic container with hot water. Add Rit dye. Follow the instructions on the dye package. Mix well. Make sure the dye is even.
Step 4: Tape The Disc
If you want patterns, use masking tape. Cover parts of the disc with tape. Create shapes or designs. Be creative!
Step 5: Dye The Disc
Wear gloves. Dip the disc in the dye. Let it soak. The longer it soaks, the darker the color. Usually, 5-10 minutes is enough.
Step 6: Rinse The Disc
Remove the disc from the dye. Rinse it with cold water. Remove the tape. Pat the disc dry with a paper towel.
Step 7: Set The Dye
Wrap the disc in plastic wrap. Let it sit for 24 hours. This helps the dye set.
Step 8: Clean The Disc Again
After 24 hours, clean the disc again. Use soap and water. Dry it with a paper towel.
Tips and Tricks
Here are some tips to help you:
- Use different colors. Experiment with mixing dyes.
- Try different patterns. Use stencils for more designs.
- Be patient. Let the dye set for the best results.
- Work in a well-ventilated area. Acetone and dyes have strong smells.
Advanced Techniques
Ready for more? Try these advanced techniques:
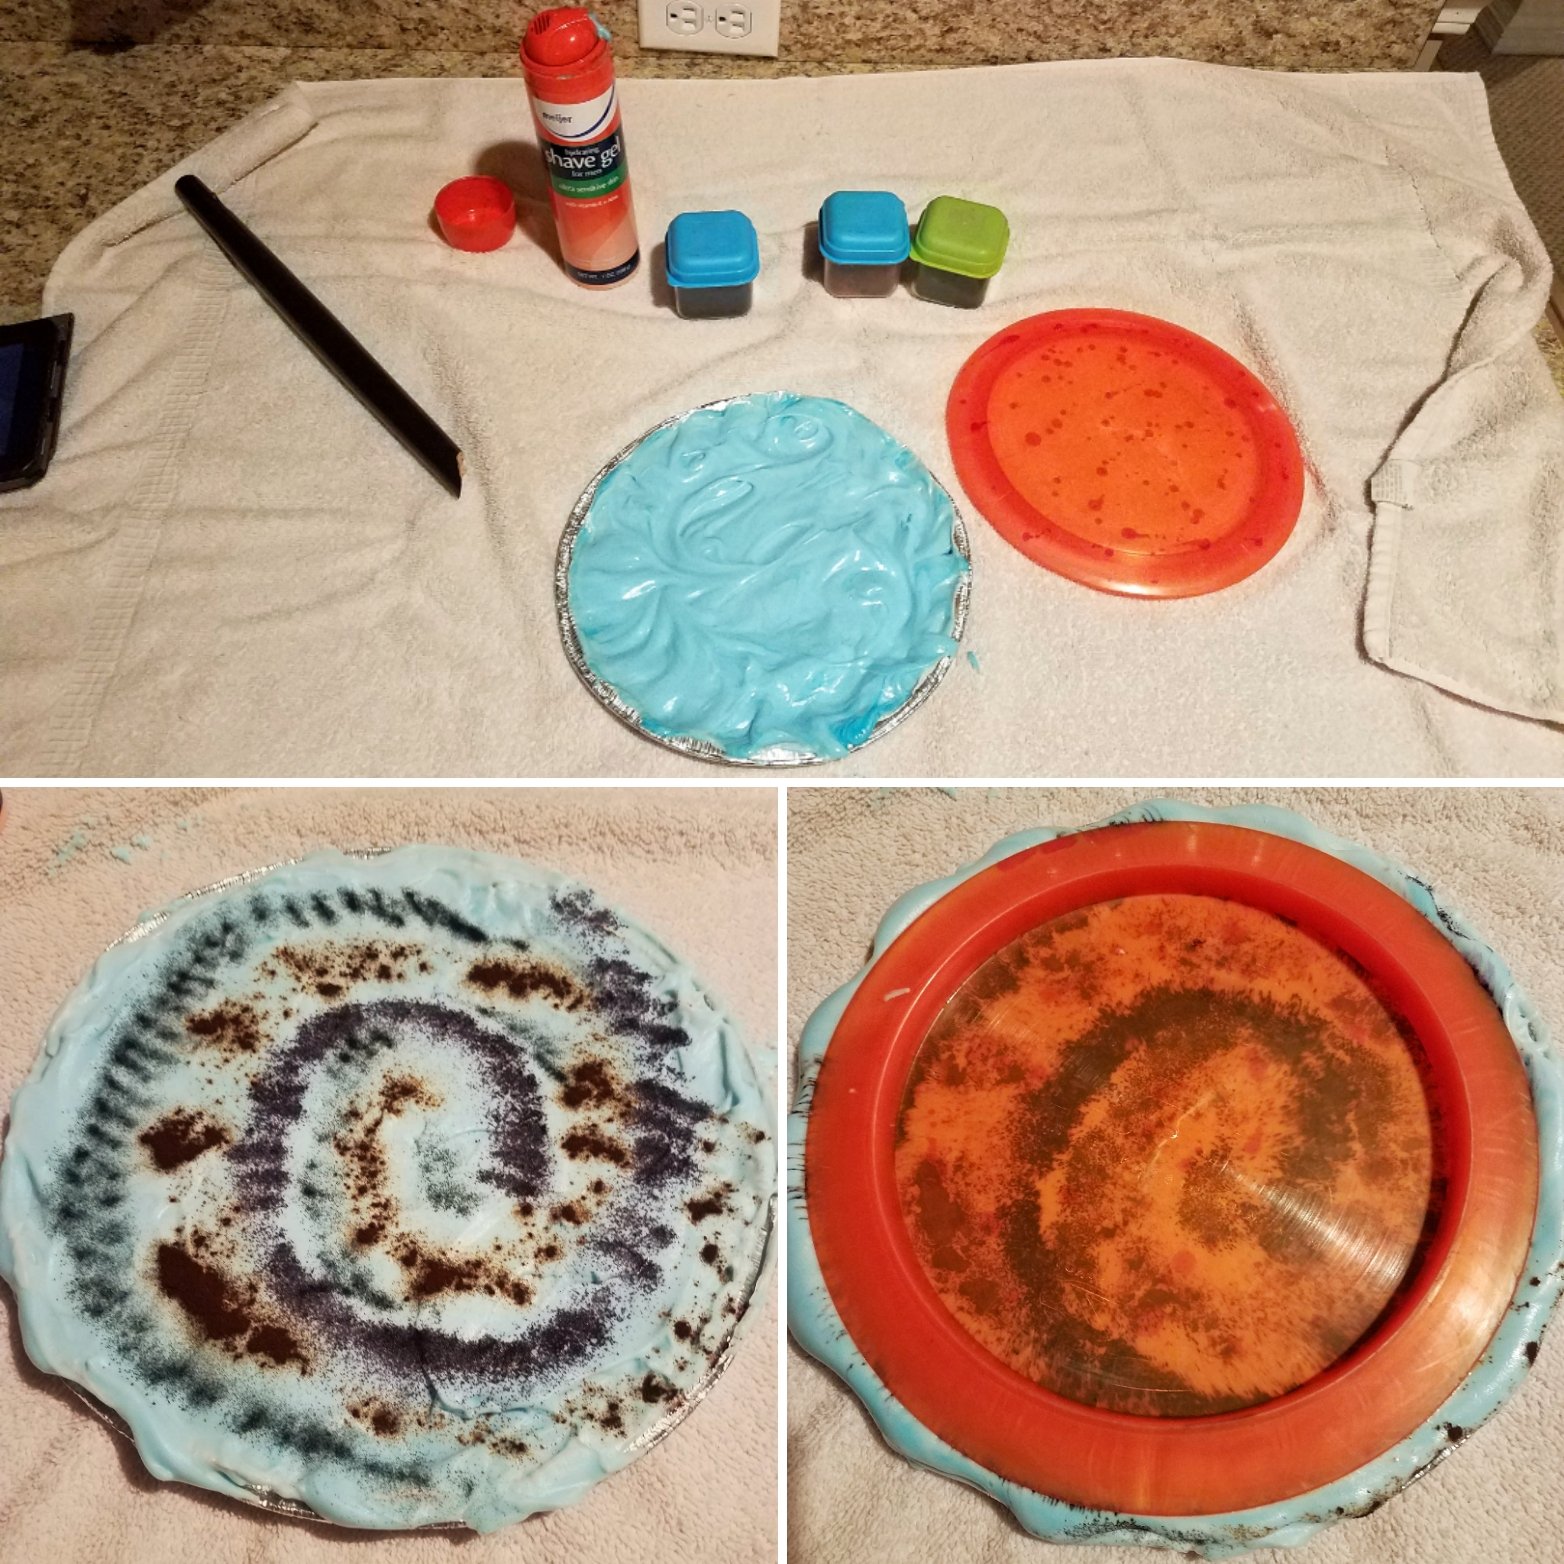
Shaving Cream Method
This method creates cool swirls. Here’s how:
- Spread shaving cream in a plastic container.
- Add drops of dye on the shaving cream.
- Swirl the dye with a toothpick.
- Press the disc into the shaving cream.
- Let it sit for 6-8 hours.
- Rinse the disc with cold water.
Glue Bed Method
This method creates marbled patterns. Follow these steps:
- Spread a thin layer of glue in a plastic container.
- Add drops of dye on the glue.
- Swirl the dye with a toothpick.
- Press the disc into the glue.
- Let it sit for 8-12 hours.
- Rinse the disc with cold water.
Spin Dye Method
This method needs a record player. It creates spiral designs. Follow these steps:
- Place the disc on the record player.
- Turn on the player.
- Use a brush to apply dye while the disc spins.
- Let the disc spin for 5-10 minutes.
- Rinse the disc with cold water.
Frequently Asked Questions
What Materials Do I Need To Dye A Disc Golf Disc?
You need dye, acetone, and a disc golf disc.
How Long Does It Take To Dye A Disc?
It usually takes 24-48 hours for the dye to set.
Can I Dye Any Disc Golf Disc?
Yes, you can dye most plastic discs.
What Type Of Dye Works Best For Disc Golf Discs?
Rit dye or iDye Poly work best for plastic discs.
Conclusion
Dyeing disc golf discs is fun. You can create unique designs. Follow these steps and tips. Experiment with colors and patterns. Enjoy your new, colorful discs!


Leave a Reply