

Do you own a golf cart? If yes, then you should know about the solenoid. The solenoid is a small but important part of your golf cart. It helps to control the flow of electricity. If your golf cart is not working, the solenoid might be the problem. This guide will help you check the solenoid on your golf cart. Follow these simple steps.
What is a Solenoid?
A solenoid is an electric switch. It controls the flow of electricity to the motor. When you press the pedal, the solenoid connects the battery to the motor. This makes the golf cart move. If the solenoid is broken, the cart will not move. So, it is important to keep it in good condition.

Credit: 10l0l.com
Tools You Need
Before you start, gather these tools:
- Wrench
- Screwdriver
- Multimeter
- Safety gloves
- Safety goggles
Steps to Check the Solenoid
Follow these steps to check the solenoid:
Step 1: Safety First
Wear safety gloves and goggles. Turn off the golf cart. Remove the key. This prevents any accidental start. Safety is important.
Step 2: Locate The Solenoid
The solenoid is usually near the battery. Look for a small, cylindrical part. It has wires connected to it. If you cannot find it, check the user manual. The manual will have a diagram.
Step 3: Inspect The Wires
Check the wires connected to the solenoid. Look for any loose or damaged wires. Tighten any loose connections with a wrench. If you find damaged wires, replace them. This might solve the problem.
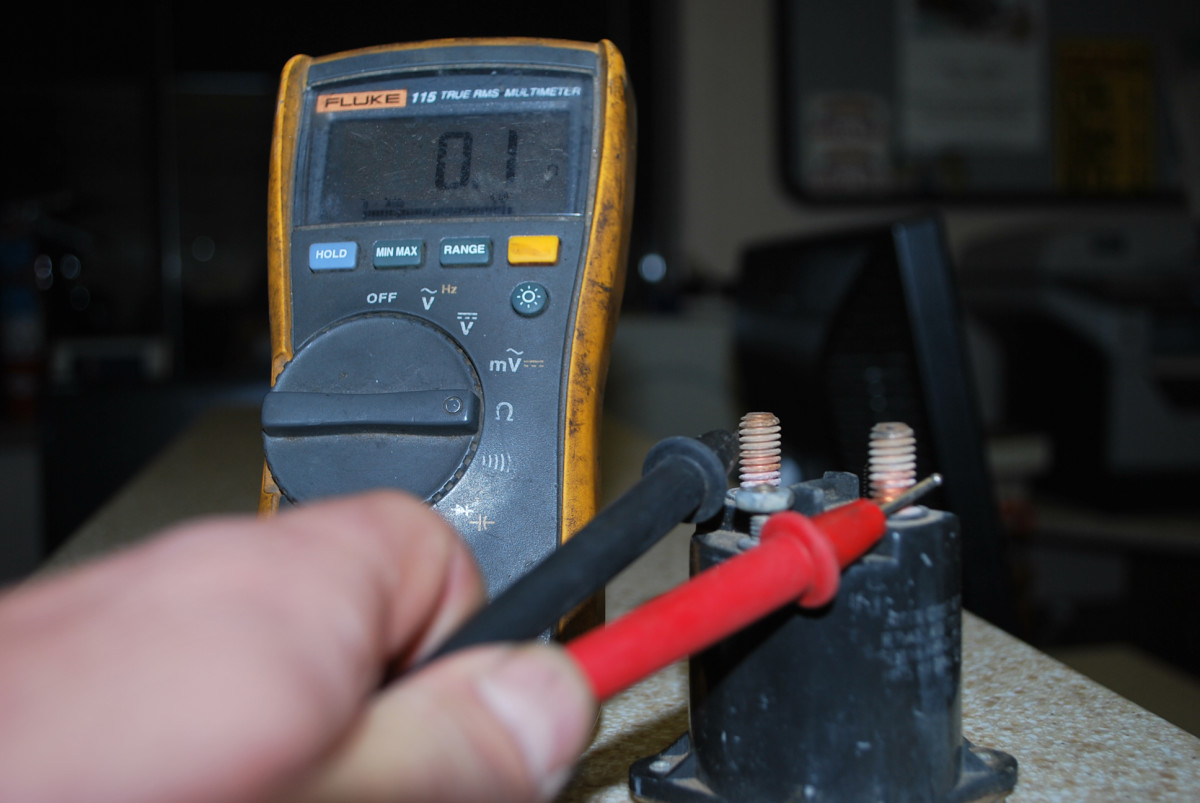
Step 4: Use A Multimeter
Now, use a multimeter to check the solenoid. Set the multimeter to the continuity test mode. Place one probe on each terminal of the solenoid. If the multimeter beeps, the solenoid is working. If it does not beep, the solenoid is broken.
Step 5: Check The Voltage
Set the multimeter to the voltage test mode. Place one probe on the battery’s positive terminal. Place the other probe on the solenoid’s positive terminal. Press the pedal. The multimeter should show a voltage reading. If it does not, the solenoid is not getting power.
What to Do if the Solenoid is Broken
If the solenoid is broken, you need to replace it. Here is how:
Step 1: Disconnect The Battery
First, disconnect the battery. This will prevent any electric shocks. Use a wrench to remove the battery cables.
Step 2: Remove The Old Solenoid
Use a screwdriver to remove the screws holding the solenoid. Disconnect the wires from the solenoid. Take out the old solenoid.
Step 3: Install The New Solenoid
Place the new solenoid in the same spot. Connect the wires to the new solenoid. Tighten the screws with a screwdriver. Make sure the connections are tight.
Step 4: Reconnect The Battery
Reconnect the battery cables. Use a wrench to tighten the connections. Make sure the connections are secure.
Step 5: Test The Golf Cart
Turn on the golf cart. Press the pedal. The cart should move. If it does, the new solenoid is working. If it does not, there might be another problem. Consult a professional for help.
Tips for Maintaining the Solenoid
Here are some tips to keep the solenoid in good condition:
- Check the solenoid regularly.
- Keep the wires tight and clean.
- Replace damaged wires immediately.
- Do not overload the golf cart.
- Keep the battery charged.
Credit: discover.hubpages.com
Frequently Asked Questions
How Do I Test A Golf Cart Solenoid?
Use a multimeter to check voltage. Connect to solenoid’s terminals. Look for a click sound.
What Are Signs Of A Bad Solenoid?
Cart won’t start or move. Clicking sound, but no action. Battery drains quickly.
Why Is My Golf Cart Solenoid Clicking?
Clicking means solenoid engages. But if cart doesn’t move, solenoid may be faulty.
Can A Golf Cart Run Without A Solenoid?
No, the solenoid completes the electrical circuit. Without it, the cart won’t run.
Conclusion
The solenoid is a key part of your golf cart. If the cart is not moving, check the solenoid. Use a multimeter to test it. If it is broken, replace it. Follow the steps in this guide. Keep the solenoid and wires in good condition. This will ensure your golf cart runs smoothly.


Leave a Reply